BST Tauri开发笔记(8)sqlite问题

将项目放到windows上试了一下问题多多,主要是sqlite编译造成的(错误代号1181),报sqlite3.lib找不到,按这篇文章解决了一下基本可行:

  1. 到sqlite官网下载源码(https://www.sqlite.org/download.html
    • Source code里的 sqlite-amalgamation-xxxx.zip
    • Precompiled Binaries for Windows的:sqlite-dll-win64-x64-xxxx.zip(我下载64bit的) 和 sqlite-tools-win32-x86-xxxx.zip
  2. 三个zip解压到同一个文件夹
  3. 开始运行里找到 Developer Command Prompt for VS 2xxx
  4. 从命令行到该目录里,运行 (64位)lib /DEF:sqlite3.def /OUT:sqlite3.lib /MACHINE:x64 或 (32位)lib /DEF:sqlite3.def /OUT:sqlite3.lib /MACHINE:x86,后生成sqlite3.lib
  5. 然后将sqlite3.lib和sqlite3.dll都复制到 src-tauri文件夹下
  6. cargo test应该可以通过了

另打包后,sqlite3.dll需要放到和exe安装目录相同的位置,或者PATH里,还不知道安装程序怎样自定义一些文件的打包。

另tauri里不能用html5的drag and drop,不知道原因是什么,这不是我说的,是tauri的管理员自己说的,并且这个问题已经很久了一直没解决。

另外tauri在mac平台上不能直接编译windows安装包,这也是我为什么要在windows上搞的原因。

还有tauri在mac平台上用safari实在是烦人,想起了以前适配ie的经历,以前是被ie折磨,现在被safari折磨。

BST Tauri 开发笔记(7)- 使用redux devtools

因为Tauri在操作系统上使用默认的系统浏览器作为webview,所以在mac系统上使用了safari,结果没法使用redux devtools,采用redux remote devtools解决。

remote-redux-devtools

安装模块

npm i remote-redux-devtools @types/remote-redux-devtools -D

修改configureStore

import { configureStore } from '@reduxjs/toolkit'
import devToolsEnhancer from 'remote-redux-devtools'
import { counterReducer } from '../features/counter/counterSlice'

export const store = configureStore({
  reducer: {
    counter: counterReducer,
  },
  devTools: false,
  enhancers: [
    devToolsEnhancer({ realtime: true, hostname: 'localhost', port: 8000 }),
  ],
})

// Infer the `RootState` and `AppDispatch` types from the store itself
export type RootState = ReturnType<typeof store.getState>
// Inferred type: {posts: PostsState, comments: CommentsState, users: UsersState}
export type AppDispatch = typeof store.dispatch

启动后发现报错,说 global 对象找不到,因为redux-remote-devtools是给React Native用的,rn里的顶级变量是global,所以打开index.html,在html的head里添加:

<script>
window.global = window
</script>

remotedev-server

安装

npm i remotedev-server -D

修改package.json

  "scripts": {
    ...,
    "remotedev": "remotedev --hostname=localhost --port=8000"
  },

启动

npm run tauri dev
npm run remotedev

打开 http://localhost:8000 应该可以看到redux store的状态了

BST Tauri 开发笔记(6)- 为Tauri接口注入全局变量

目的,想要在对JS能调用的invoke接口中提供持续的db connection对象,一开始想用比较简单粗暴的方式每次都重新连接一次本地的sqlite数据库,后来发现Tauri可以注入的功能,就有了以下的使用方法:

main.rs

use rusqlite::Connection;
use tauri::State;
use std::sync::Mutex;

struct DbConnection {
    db: Mutex<Option<Connection>>,
}

// 注入的state会自动匹配声明的变量
#[tauri::command]
fn query(some_param: i32, connection: State<DbConnection>) -> Vec<String> {
    println!("some_param={}", some_param);

    let db = connection.db.lock();
    let conn = db.as_ref().unwrap().as_ref().unwrap();
    let mut stmt = conn.prepare("SELECT name_en FROM books").unwrap();
    let rows = stmt.query_map([], |row| row.get(0)).unwrap();

    let mut names = Vec::new();
    for name_result in rows {
        names.push(name_result.unwrap());
    }
    names
}

fn main() {
    tauri::Builder::default()
        // 注入state
        .manage(DbConnection {
            db: Mutex::new(Some(
                Connection::open("./resources/db.sqlite").unwrap(),
            )),
        })
        .invoke_handler(tauri::generate_handler![query])
        .run(tauri::generate_context!())
        .expect("error while running tauri application");
}

在React中使用接口:

App.tsx

import { invoke } from '@tauri-apps/api'
import { FunctionComponent } from 'react'

interface AppProps {}

const App: FunctionComponent<AppProps> = () => {
  return (
    <div className="tw-w-screen tw-h-screen">
      <button
        onClick={async () => {
          const names = await invoke('query', { someParam: 123 })
          console.log(names)
        }}
      >
        query3
      </button>
    </div>
  )
}

export default App

这样就能在所有的tauri接口中使用同一个db 的connection对象了!

文档:https://docs.rs/tauri/1.2.4/tauri/trait.Manager.html#method.manage

如何阻止浏览器超出滚动的弹跳效果

最近做Tauri,发现Tauri虽然少了Chromium大大缩小了安装包的大小,但是用操作系统内本地的浏览器做WebView实在是太不靠谱了,Mac电脑上的Safari简直就是一个大毒瘤,为了搞这个适配问题,感觉回到了兼容IE时代,Tauri的开发者拜托至少给个Chromium的选项别一刀切,比起适配如此痛苦,我真不在乎那几十兆的浏览器。

原文:https://www.bram.us/2016/05/02/prevent-overscroll-bounce-in-ios-mobilesafari-pure-css/

目的:禁止浏览器超出部分滚动的弹跳效果

除Safari以外的浏览器:

html, body {
  overscroll-behavior-y: none;
}

Safari:

html,
body {
  position: fixed;
  overflow: hidden;
}

body > .mainwrapper {
  width: 100vw;
  height: 100vh;
  overflow-y: scroll;
  -webkit-overflow-scrolling: touch; /* enables “momentum” (smooth) scrolling */
}
<html>
…
<body>
  <div class="mainwrapper">
    …
  </div>
</body>
</html>

据该博客的2021年补充说,因为bug上面的方法在ios12里也不支持,我没有测试,但至少在Tauri的浏览器里可以,而且无需加上 mainwrapper等。

BST Tauri 开发笔记(5)- 自定义窗口标题栏

参考:

https://tauri.app/v1/guides/features/window-customization/

https://tauri.app/v1/api/config#windowconfig

创建css(测试可以写在index.html里)

      .titlebar {
        height: 30px;
        background: #329ea3;
        user-select: none;
        display: flex;
        justify-content: flex-end;
        position: fixed;
        top: 0;
        left: 0;
        right: 0;
      }
      .titlebar-button {
        display: inline-flex;
        justify-content: center;
        align-items: center;
        width: 30px;
        height: 30px;
      }
      .titlebar-button:hover {
        background: #5bbec3;
      }

添加标题栏的html结构(index.html)

    <div data-tauri-drag-region class="titlebar">
      <div class="titlebar-button" id="titlebar-minimize">
        <img
          src="https://api.iconify.design/mdi:window-minimize.svg"
          alt="minimize"
        />
      </div>
      <div class="titlebar-button" id="titlebar-maximize">
        <img
          src="https://api.iconify.design/mdi:window-maximize.svg"
          alt="maximize"
        />
      </div>
      <div class="titlebar-button" id="titlebar-close">
        <img src="https://api.iconify.design/mdi:close.svg" alt="close" />
      </div>
    </div>

绑定事件(main.tsx)

import { appWindow } from '@tauri-apps/api/window'
document
  .getElementById('titlebar-minimize')
  ?.addEventListener('click', () => appWindow.minimize())
document
  .getElementById('titlebar-maximize')
  ?.addEventListener('click', () => appWindow.toggleMaximize())
document
  .getElementById('titlebar-close')
  ?.addEventListener('click', () => appWindow.close())

tauri.conf.json

    "allowlist": {
      ...
      "window": {
        "all": false,
        "close": true,
        "hide": true,
        "show": true,
        "maximize": true,
        "minimize": true,
        "unmaximize": true,
        "unminimize": true,
        "startDragging": true
      }
    },
    "windows": [
      {
        "fullscreen": false,
        "resizable": true,
        "title": "bible-study-tool-app",
        "width": 800,
        "height": 600,
        "decorations": false
      }
    ]

透明背景(如果使用圆角窗口)

tauri.conf.json 编辑 windows 下的 transparent 设为 true,macOS要把 tauri 下的 macOSPrivateApi 设置成 true

    "windows": [
      {
        ...
        "transparent": true
      }
    ],
    "macOSPrivateApi": true

并且把 html 元素设置为透明

<html lang="en" data-theme="light" style="background-color: rgba(0, 0, 0, 0)">

BST Tauri 开发笔记(4)- Tailwind CSS / DaisyUI

安装Tailwindcss

npm install -D tailwindcss postcss autoprefixer 

生成 tailwind.conf.cjs

npx tailwindcss init -p  

安装daisyui和daisyui react

npm i daisyui react-daisyui    

taiwind.config.cjs

/** @type {import('tailwindcss').Config} */
module.exports = {
  content: ['./index.html', './src/**/*.{js,ts,jsx,tsx}'],
  theme: {
    extend: {},
  },
  plugins: [require('daisyui')],
}

设置主题 index.html

<!DOCTYPE html>
<html lang="en" data-theme="light">
...

BST Tauri 开发笔记(3)- 打包资源文件

参考:https://tauri.app/v1/guides/building/resources/

编辑 tauri.conf.jsonbundle 下面添加 resources,allowlist里也要添加这一行(如果无需用js访问该文件则不用):

    "bundle": {
      "active": true,
      "icon": [
        "icons/32x32.png",
        "icons/128x128.png",
        "icons/128x128@2x.png",
        "icons/icon.icns",
        "icons/icon.ico"
      ],
      "identifier": "com.cruelyouth.bst-app",
      "targets": "all",
      "resources": [
        "resources/*"
      ]
    },
    "allowlist": {
      "fs": {
        "scope": ["$RESOURCE/*"]
      }
    }

在rust中访问文件

tauri::Builder::default()
  .setup(|app| {
    let resource_path = app.path_resolver()
      .resolve_resource("lang/de.json")
      .expect("failed to resolve resource");

    let file = std::fs::File::open(&resource_path).unwrap();
    let lang_de: serde_json::Value = serde_json::from_reader(file).unwrap();

    println!("{}", lang_de.get("hello").unwrap()); // This will print 'Guten Tag!' to the terminal

    Ok(())
  })

#[tauri::command]
fn hello(handle: tauri::AppHandle) -> String {
   let resource_path = handle.path_resolver()
      .resolve_resource("lang/de.json")
      .expect("failed to resolve resource");

    let file = std::fs::File::open(&resource_path).unwrap();
    let lang_de: serde_json::Value = serde_json::from_reader(file).unwrap();

    lang_de.get("hello").unwrap().to_string()
}

该文件夹下放入一个文件,打包试试 npm run tauri build 打包后的可执行文件中嵌入了该资源文件。

BST Tauri项目笔记(2)Prettier

安装prettier

npm i -D prettier eslint-config-prettier eslint-plugin-prettier

创建.prettierrc.cjs

module.exports = {
  trailingComma: 'es5',
  tabWidth: 2,
  semi: false,
  singleQuote: true,
}

修改.eslintrc.cjs

  extends: [
    'airbnb',
    'airbnb-typescript',
    'airbnb/hooks',
    'plugin:react/recommended',
    'plugin:@typescript-eslint/recommended',
    // 添加下面
    'plugin:prettier/recommanded',
  ],
  ...,
  // 添加prettier插件
  plugins: ['react', '@typescript-eslint', 'prettier'],

BST Tauri项目笔记(1)eslint

创建Tauri项目

npm create tauri-app

选项如下

✔ Project name · bible-study-tool-app
✔ Choose which language to use for your frontend · TypeScript / JavaScript - (pnpm, yarn, npm)
✔ Choose your package manager · npm
✔ Choose your UI template · React - (https://reactjs.org/)
✔ Choose your UI flavor · TypeScript

安装npm 依赖

cd bible-study-tool-app
npm install
npm run tauri dev

安装配置eslint

npm i -D eslint

创建eslint配置

npx eslint --init

选项如下

✔ How would you like to use ESLint? · problems
✔ What type of modules does your project use? · esm
✔ Which framework does your project use? · react
✔ Does your project use TypeScript? · No / Yes
✔ Where does your code run? · browser
✔ What format do you want your config file to be in? · JavaScript

eslint-plugin-react@latest @typescript-eslint/eslint-plugin@latest @typescript-eslint/parser@latest
✔ Would you like to install them now? · No / Yes
✔ Which package manager do you want to use? · npm

安装airbnb配置

https://www.npmjs.com/package/eslint-config-airbnb
https://www.npmjs.com/package/eslint-config-airbnb-typescript

npx install-peerdeps --dev eslint-config-airbnb
npm i -D eslint-config-airbnb-typescript

添加配置 .eslintrc.cjs

  extends: [
    // 删掉eslint-recommanded项
    'airbnb',
    'airbnb-typescript',
    'airbnb/hooks',
    // 添加以上三行
    'plugin:react/recommended',
    'plugin:@typescript-eslint/recommended',
  ],
  ...,
  parserOptions: {
    ecmaVersion: 'latest',
    sourceType: 'module',
    // 添加以下这行
    project: './tsconfig.json',
  },
  ...,
  rules: {
    // 禁止以下规则,我不喜欢语句加分号 seme colon
    'react/react-in-jsx-scope': 0,
    '@typescript-eslint/semi': 0,
  },

tsconfig.json 中加入:

"include": [".eslintrc.cjs", "src"],

用Tauri+React构建桌面应用

Tauri是一个取代Electron的方案,而且比Electron应用方面更广,马上也可以用来创建手机应用,而且架构使用rust作为后端,不嵌入chromium的方式也大大减小app的体积和占用的内存。

简单用一个实例说明如何使用react项目构建一个Tauri App,只需要很短的时间就可以完成此教程。

预先安装

需要先安装好npm、cargo等运行环境,参考 https://tauri.app/zh-cn/v1/guides/getting-started/prerequisites

安装tauri-cli

cargo install tauri-cli

创建react项目

如果已有react项目可以略过这一步

npx create-react-app hello-tauri-react

创建Tauri app

cd hello-tauri-react # 进入react项目的路径中

cargo tauri init

这里会问你6个问题,作为配置写在生成好的tauri.conf.json文件里,结束后会为你创建 src-tauri文件夹

第五个问题问你如何启动前端环境,因为是用CRA创建的项目,因此应该是 npm start

其余问题保持原样就可以

启动测试环境

cargo tauri dev

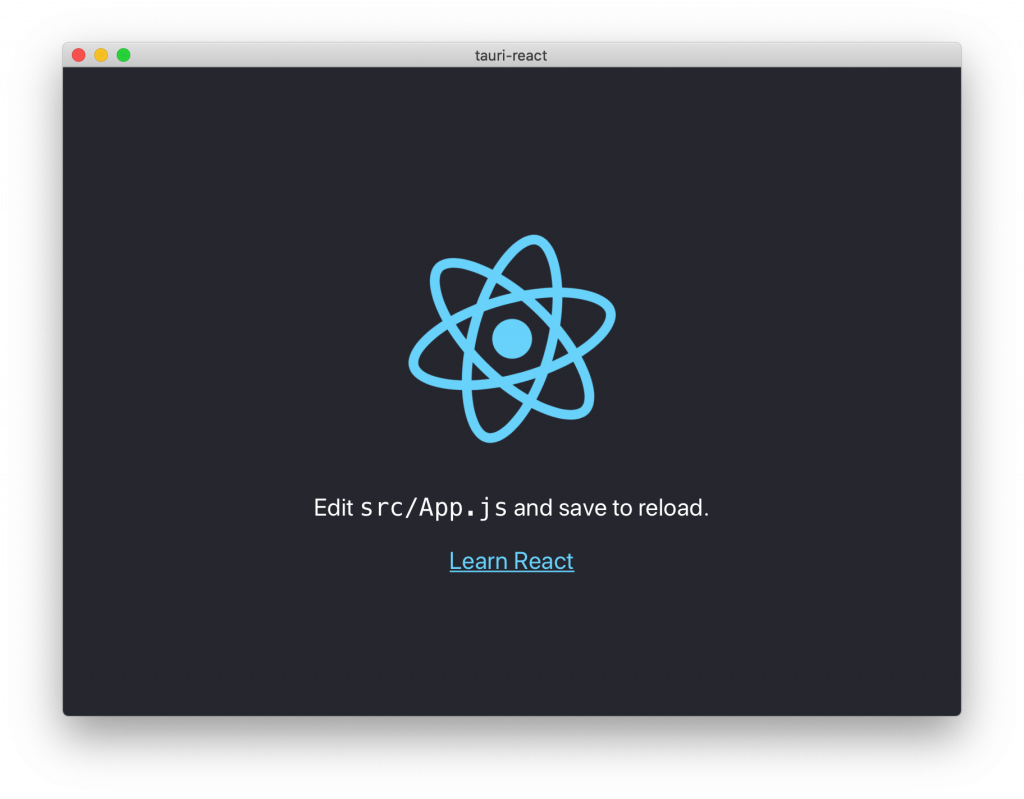
这里它会先启动react环境,再启动app客户端,当你看到这个界面,就是成功了

客户端界面

你会注意到,浏览器窗口自动弹起来是不必要的,打开tauri.conf.json文件,修改 build -> beforeDevCommand

"beforeDevCommand": "BROWSER=none npm start",

这样下次启动的时候就不会再打开浏览器窗口了

发布打包

cargo tauri build

会报一个错误

`com.tauri.dev` is not allowed as it must be unique across application

就是说app的id标识符不让你用com.tauri.dev这个名字,在tauri.conf.json 中找到 tauri -> bundle -> identifier 随便改成你自己想取的名字,再运行

cargo tauri build

Bingo!现在应该可以发布的app生成好了,我是mac系统,文件生成在 src-tauri/target/release/bundle/ 中 pkg是打包后的,macos里有可运行的app,它还帮你生成了安装包,真的是很愉快的开发体验!